Since the implementation of DLT by operators across India, the mapping of Entity ID to your usernames has become mandatory by Kaleyra as well.
To know more about the entity registration (Principle Entity) process with operators, click - Here.
Once you receive the EntityID from the Operator (it usually takes 24-48 hours), you can go ahead with this ID to add it in the Kaleyra portal as well.
Entity ID can be added at the account level with the below steps. This will apply the Entity ID to all the raised SenderIDs automatically when you select the option on creating a SenderID
On the Kaleyra platform, you can easily do this by following the below steps:
- Log into the Application (Alerts or Promo) and sign in with your credentials.
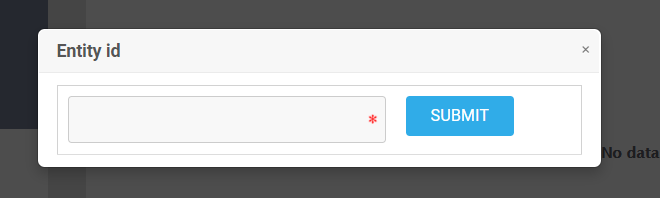
- Once in, on the top right corner, click on the “+” Symbol to collapse the menu. You should see an option as “+Entity ID”. Click on that.

- A pop-up window would appear, for you to enter the Entity ID. Go ahead and fill in the details here and click submit.
Not sure where you can get this EntityID from? Check this article on Entity Registration with Operators - Here.
- In case you need to edit the Entity ID at any time, follow the above steps again. You will now get an edit option in the pop-up window that appears. Make the changes and submit the Entity ID.

The length on characters is 12(min) and 19(max)
Next, to add a SenderID with the mapped Entity ID, follow the below steps:
Log into the Application (Alerts or Promo) and sign in with your credentials.
Find the option “Manage Items” in the left-hand menu and Click on “Manage SenderIDs”

Once the page opens, click on “+New” on the right-hand side of the page.

A pop-up would appear as below. In this pop-up, you will see an option (highlighted below) as “Do you want to append the Account’s Entity ID to the SenderID?”. On selecting this, the Entity ID added to the account will automatically populate.
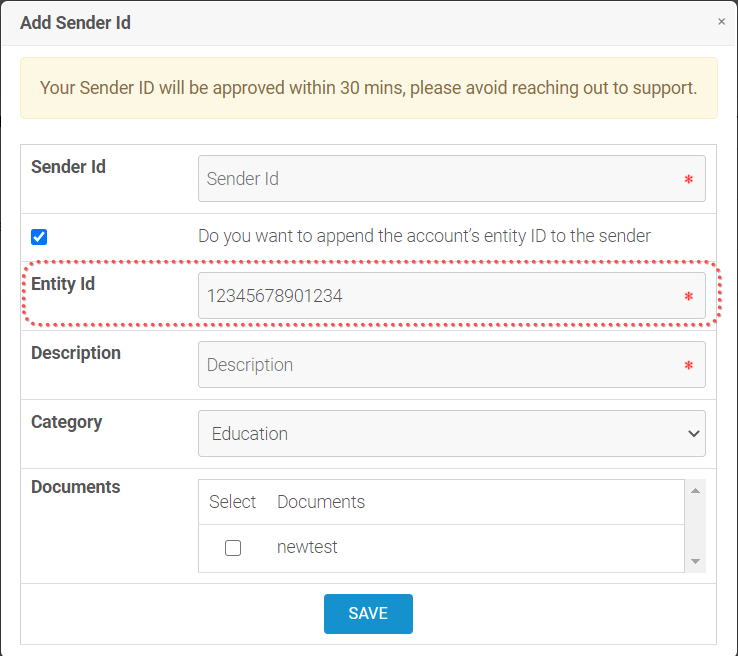
Fill in all the details as below and click on “Submit”.
Once this is approved it will reflect on the panel.
